Tuesday, July 2, 2013

How To Clean Between Your Oven Door Glass

Hi ALL happy 2nd of July! Wow summer has come in with a bang here in Northern California. I must say I'm not a fan of the 100+ degree days so I'm finding things to do indoors. Anyway I came across this on Pinterest this afternoon. This is a great web site Ask Anna http://askannamoseley.com/ .  I don't know if this works, but I'm going to certainly check it out as my glass needs some help. 


Since writing the post on how to  clean the oven, I have received so many questions about how to clean between the oven window glass, so today I am finally posting a tutorial for you! 
Step 1: Remove the drawer from below the oven. 
Step 2: Build a cleaning contraption. Luckily I had saved a wire hanger from the dry cleaners, for just an occasion like this! 
I straightened the hanger and then attached a cleaning wipe to the hook on the end. Use a rubber band to secure the wipe, to make sure you don't lose it in between the glass! 
I recommend using a glass cleaner wipe, such as these Windex wipes.
Step 3: Lay down on the floor and look under the door of your oven. You will see slots between the oven door and the window glass, that look like these. 
Step 4: Slide the cleaning "contraption" up through the slats.
Push it up between the oven window glass, cleaning from side to side as you move it up, farther into the door. 
Step 5: Pull the cleaning "contraption" out of the slots when you are done cleaning between the window glass. If your glass is really dirty it might take a couple of wipes to get it all clean. I was surprised to see how dirty mine was!
Step 6: Enjoy your clean, streak-free oven door!
I found the information from this tutorial on this forum.

Friday, June 14, 2013

Hydrogen Peroxide Magic!


HYDROGEN PEROXIDE MAGIC!

Ever since I started using Hydrogen Peroxide to get rid of armpit stains, to clean cookie sheets, as a miracle cleaner in my kitchen and bathroom, and to make my own “oxi clean”…I ALWAYS have at least one bottle of the stuff under my kitchen sink, under my bathroom sink, AND in the laundry room. This stuff is amazingly versatile!

But it wasn’t until recently, after doing some IN DEPTH research on the subject, that I came to realize what a “miracle substance” hydrogen peroxide really is! It’s safe, it’s readily available, it’s cheap, and best of all, it WORKS! It works for a LOT of stuff!

Hydrogen peroxide should really be called oxygen water, since it is basically the same chemical make up as water but with an extra oxygen atom (H2O2). Because of this it breaks down quickly and harmlessly into oxygen and water.

Some other interesting facts about hydrogen peroxide:

It is found in all living material.
Your white blood cells naturally produce hydrogen peroxide (H2O2) to fight bacteria and infections.
Fruit and vegetables naturally produce hydrogen peroxide. This is one of the reasons why it is so healthy to eat fresh fruit and vegetables.
It is found in massive dosages in the mother’s first milk, called colostrum, and is transferred to the baby to boost their immune system.
It is found in rain water because some of the H20 in the atmosphere receives an additional oxygen atom from the ozone (O3) and this H2O2 makes plants grow faster.
Next to Apple Cider Vinegar, hydrogen peroxide ranks up there as one of the best household remedies.

Besides the obvious (cleansing wounds), did you know that it is probably the best remedy to dissolve ear wax? Brighten dingy floors? Add natural highlights to your hair? Improve your plants root systems? The list goes on and on!

There are SO many uses for this stuff that I’ve started replacing the cap on the hydrogen peroxide bottle with a sprayer because it’s easier and faster to use that way.

I have compiled a rather impressive list of uses for 3% hydrogen peroxide that I hope will have you as thrilled and bewildered as I was!

Wash vegetables and fruits with hydrogen peroxide to remove dirt and pesticides. Add 1/4 cup of H2O2 to a sink of cold water. After washing, rinse thoroughly with cool water.

In the dishwasher, add 2 oz. to your regular detergent for a sanitizing boost. Also, beef up your regular dish soap by adding roughly 2 ounces of 3% H2O2 to the bottle.

Use hydrogen peroxide as a mouthwash to freshen breath. It kills the bacteria that causes halitosis. Use a 50/50 mixture of hydrogen peroxide and water.

Use baking soda and hydrogen peroxide to make a paste for brushing teeth. Helps with early stages of gingivitis as it kills bacteria. Mixed with salt and baking soda, hydrogen peroxide works as a whitening toothpaste.

Soak your toothbrush in hydrogen peroxide between uses to keep it clean and prevent the transfer of germs. This is particularly helpful when you or someone in your family has a cold or the flu.

Clean your cutting board and countertop. Let everything bubble for a few minutes, then scrub and rinse clean. (I’ve been using it for this a LOT lately!)

Wipe out your refrigerator and dishwasher. Because it’s non-toxic, it’s great for cleaning places that store food and dishes.

Clean your sponges. Soak them for 10 minutes in a 50/50 mixture of hydrogen peroxide and warm water in a shallow dish. Rinse the sponges thoroughly afterward.

Remove baked-on crud from pots and pans. Combine hydrogen peroxide with enough baking soda to make a paste, then rub onto the dirty pan and let it sit for a while. Come back later with a scrubby sponge and some warm water, and the baked-on stains will lift right off.

Whiten bathtub grout. First dry the tub thoroughly, then spray it liberally with hydrogen peroxide. Let it sit — it may bubble slightly — for a little while, then come back and scrub the grout with an old toothbrush. You may have to repeat the process a few times.

Clean the toilet bowl. Pour half a cup of hydrogen peroxide into the toilet bowl, let stand for 20 minutes, then scrub clean.

Remove stains from clothing, curtains, and tablecloths. Hydrogen peroxide can be used as a pre-treater for stains — just soak the stain for a little while in 3% hydrogen peroxide before tossing into the laundry. You can also add a cup of peroxide to a regular load of whites to boost brightness. It’s a green alternative to bleach, and works just as well.

Brighten dingy floors. Combine half a cup of hydrogen peroxide with one gallon of hot water, then go to town on your flooring. Because it’s so mild, it’s safe for any floor type, and there’s no need to rinse.

Clean kids’ toys and play areas. Hydrogen peroxide is a safe cleaner to use around kids, or anyone with respiratory problems, because it’s not a lung irritant. Spray toys, toy boxes, doorknobs, and anything else your kids touch on a regular basis.

Help out your plants. To ward off fungus, add a little hydrogen peroxide to your spray bottle the next time you’re spritzing plants.

Add natural highlights to your hair. Dilute the hydrogen peroxide so the solution is 50% peroxide and 50% water. Spray the solution on wet hair to create subtle, natural highlights.

According to alternative therapy practitioners, adding half a bottle of hydrogen peroxide to a warm bath can help detoxify the body. Some are skeptical of this claim, but a bath is always a nice way to relax and the addition of hydrogen peroxide will leave you – and the tub – squeaky clean!

Spray a solution of 1/2 cup water and 1 tablespoon of hydrogen peroxide on leftover salad, drain, cover and refrigerate. This will prevent wilting and better preserve your salad.

Sanitize your kids’ lunch boxes/bags.

Dab hydrogen peroxide on pimples or acne to help clear skin.

Hydrogen peroxide helps to sprout seeds for new plantings. Use a 3% hydrogen peroxide solution once a day and spritz the seed every time you re-moisten. You can also use a mixture of 1 part hydrogen peroxide to 32 parts water to improve your plants’ root system.

Remove yellowing from lace curtains or tablecloths. Fill a sink with cold water and a 2 cups of 3% hydrogen peroxide. Soak for at least an hour, rinse in cold water and air dry.

Use it to remove ear wax. Use a solution of 3% with olive or almond oil. Add a couple drops of oil first then H2O2. After a few minutes, tilt head to remove solution and wax.

Helps with foot fungus. Spray a 50/50 mixture of hydrogen peroxide and water on them (especially the toes) every night and let dry. Or try soaking your feet in a peroxide solution to help soften calluses and corns, and disinfect minor cuts.

Spray down the shower with hydrogen peroxide to kill bacteria and viruses.

Use 1 pint of 3% hydrogen peroxide to a gallon of water to clean humidifiers and steamers.

Wash shower curtains with hydrogen peroxide to remove mildew and soap scum. Place curtains in machine with a bath towel and your regular detergent. Add 1 cup full strength 3% hydrogen peroxide to the rinse cycle.

Use for towels that have become musty smelling. 1/2 cup Peroxide and 1/2 cup vinegar let stand for 15 minutes wash as normal. Gets rid of the smell.

Use hydrogen peroxide to control fungi present in aquariums. Don’t worry, it won’t hurt your fish. Use sparingly for this purpose.

De-skunking solution. Combine 1 quart 3% H2O2, 1/4 cup baking soda, 1 teaspoon Dawn dish detergent, 2 quarts warm water.

Sunday, June 2, 2013

Lemonade Kool-Aid as Dishwasher Cleaner

Lemonade Kool-Aid and a dishwasher

Clean lime deposits and iron stains inside the dishwaher by pouring a packet of lemonade Kool-Aid (the only flavor that works) into the detergent cup and running the (empty) dishwasher. The citric acid in the mix wipes out all the stains.

Sunday, March 10, 2013

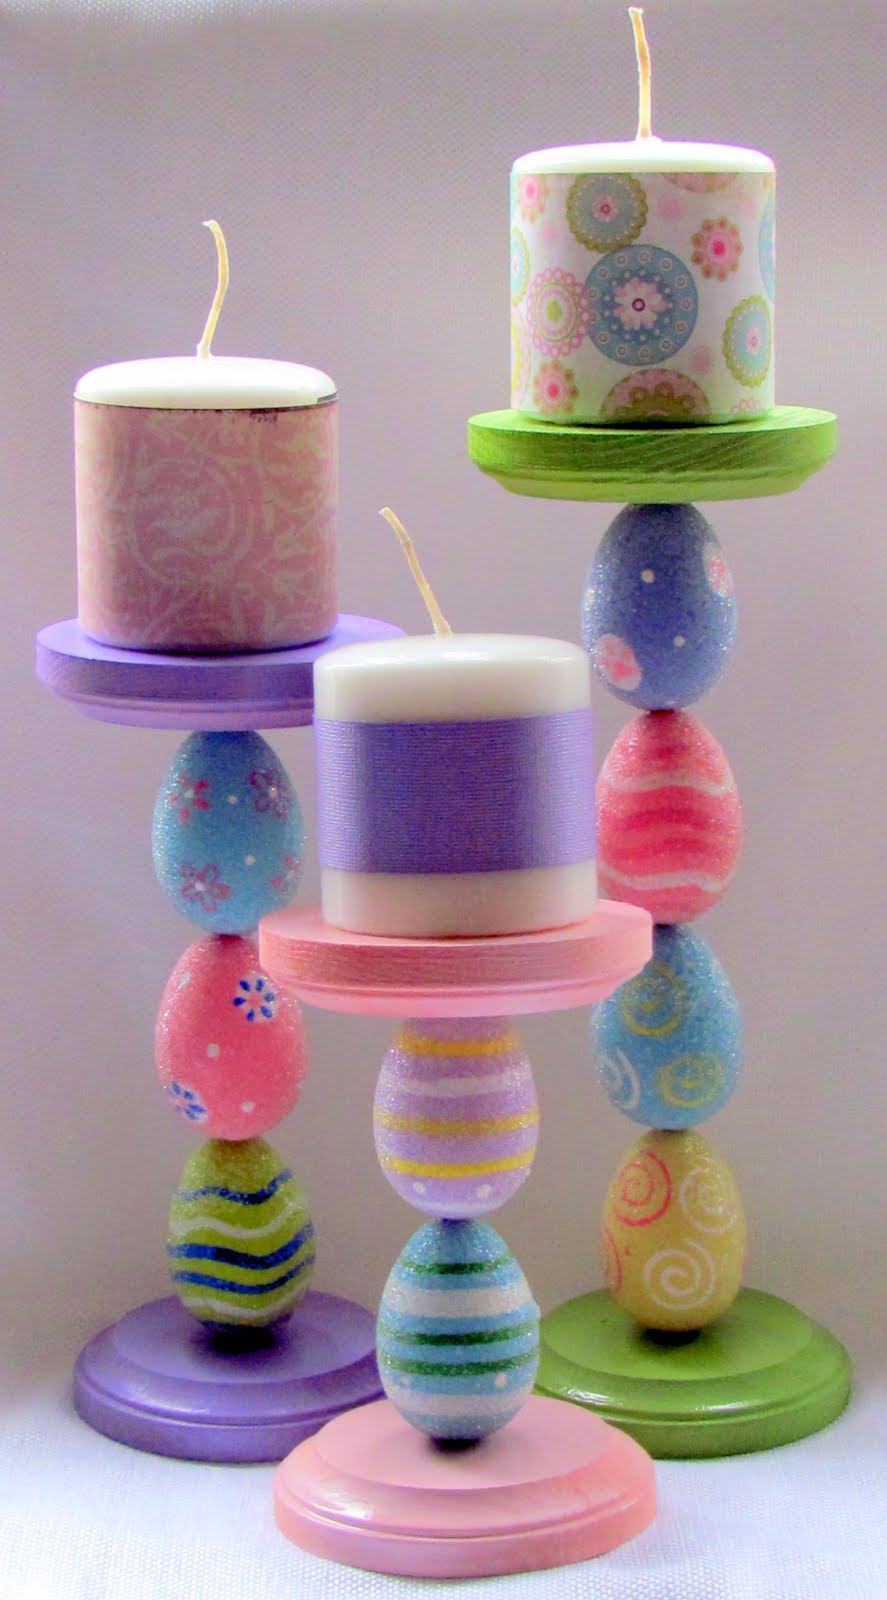
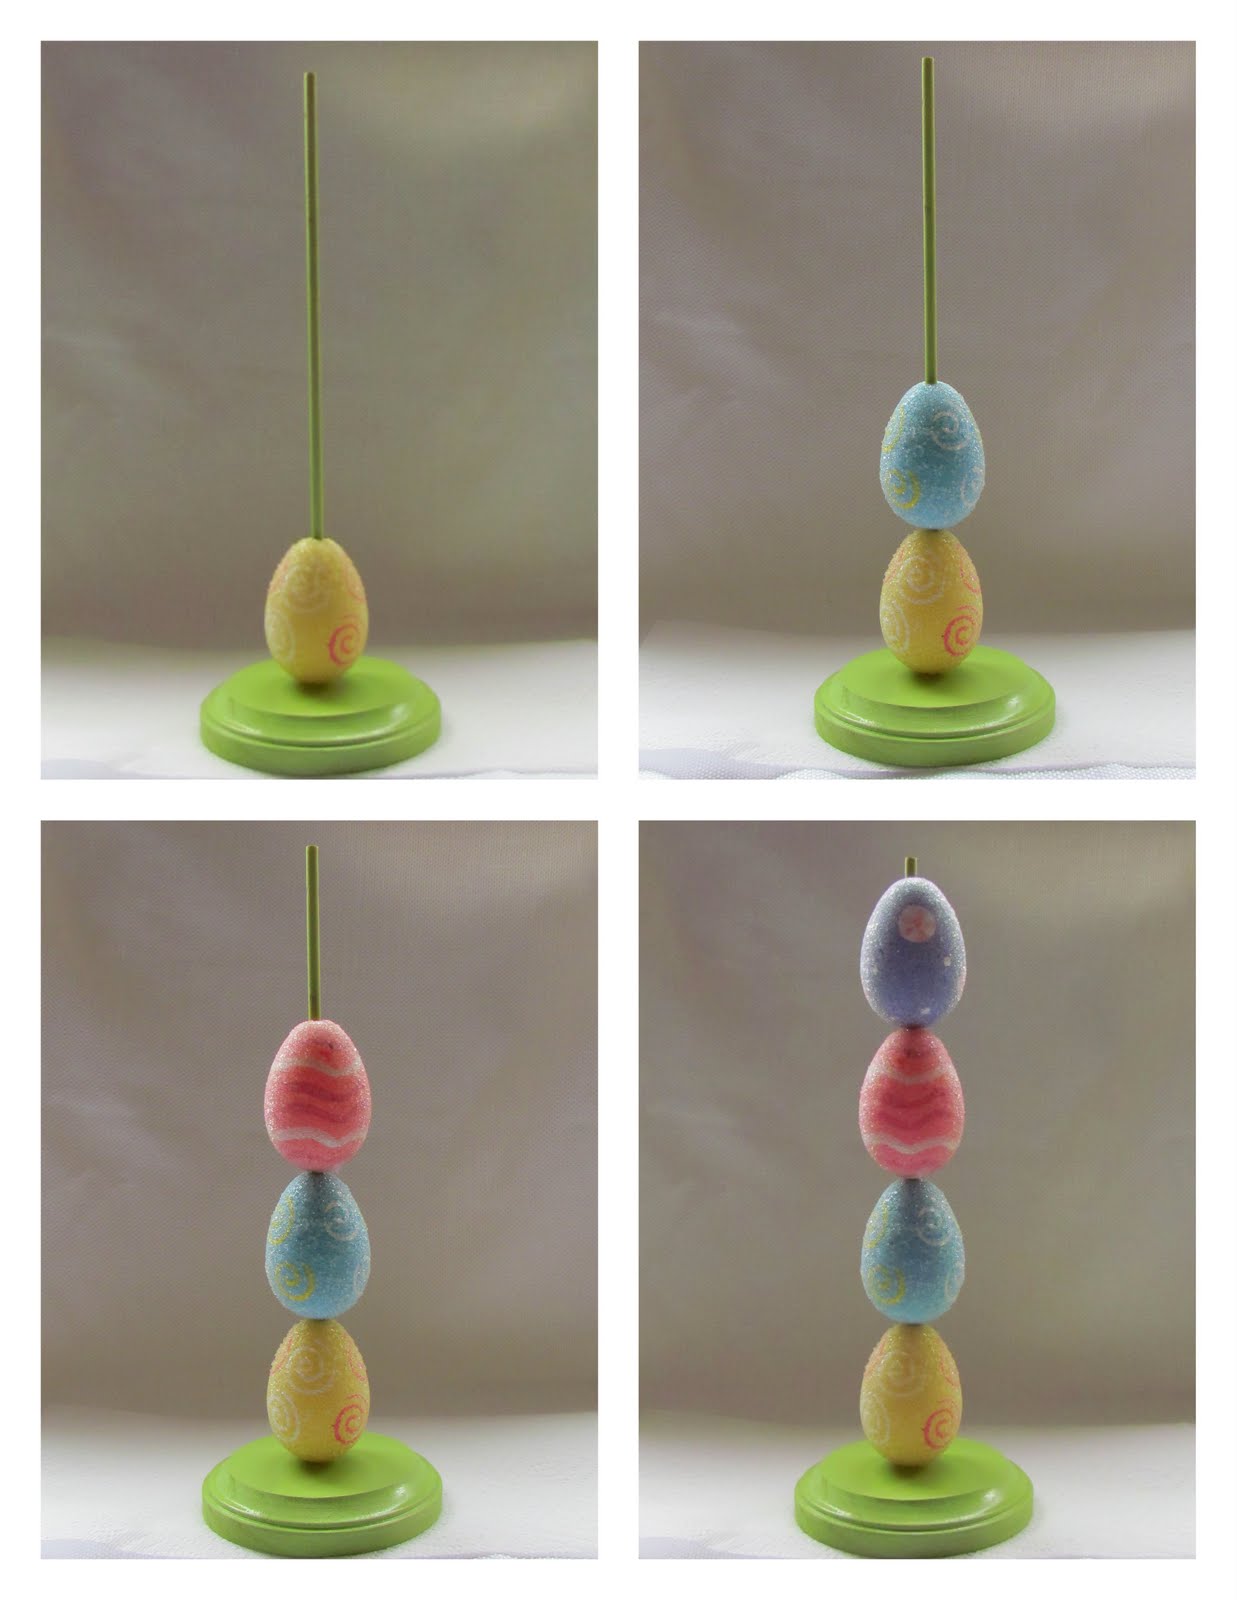
DIY Easter Candle Sticks


Hello aren't these just adorable!? I found these on Pinterest and thought I'd share them. I found the tutorial on the csiproject.com blog from JC's Loft blog. I will be going to Hobby Lobby for supplies and making these and I hope this inspires you enough to do the same. I hope you are enjoying your weekend, here in Northern California it's beautiful! 


You can usually find me blogging about fabulous ways to decorate on a budget.  I LOVE finding a way to decorate for the Holidays on next to nothing.  Easter is no exception.  So when I finished these amazingly cheap but chic Egg Candlesticks I knew I had to share my tutorial with you CSI readers…enjoy!
If you want to learn how to make these cuties then keep reading!

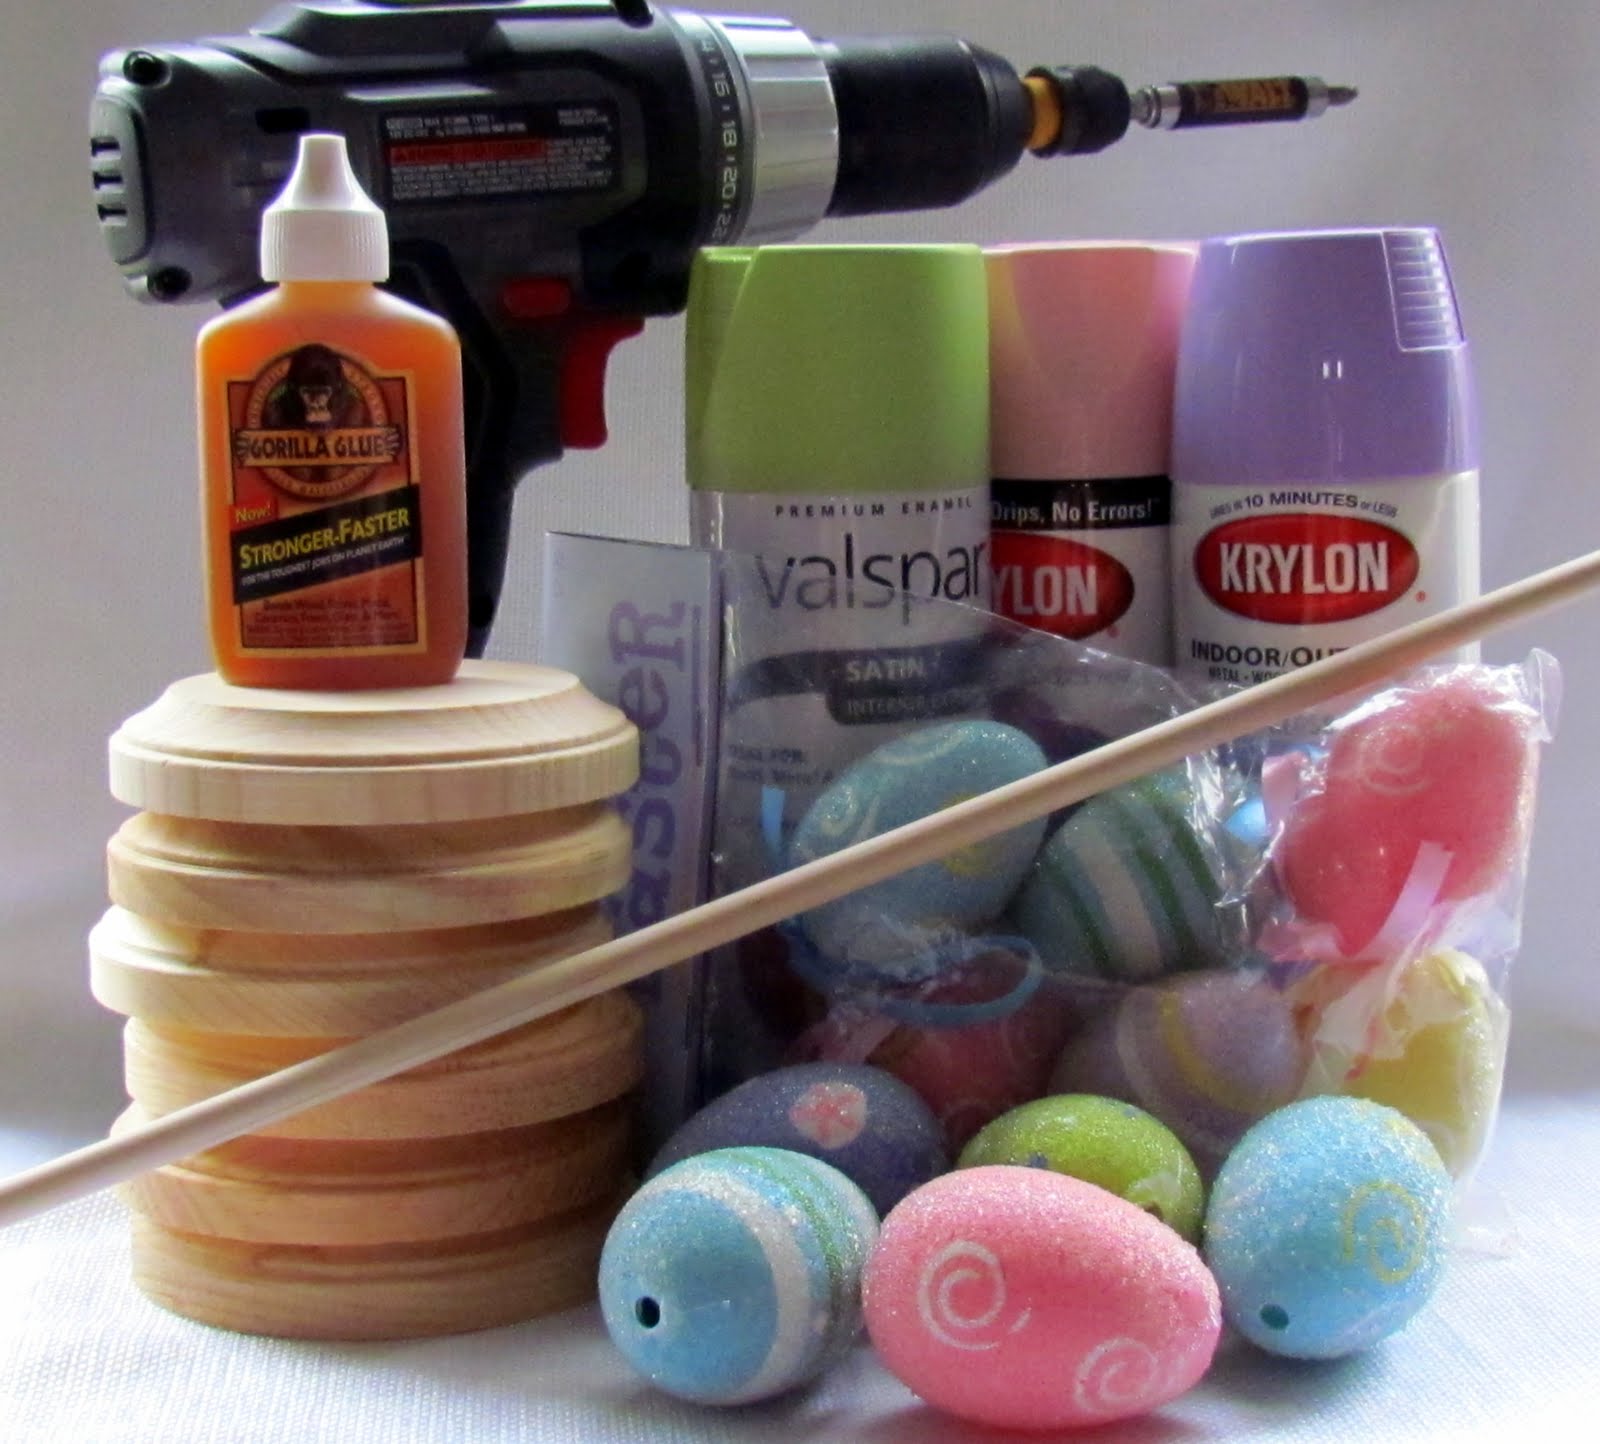
Supplies:
- Plastic Eggsplastic eggs (I purchased mine from Hobby Lobby)
- 2 Small round pieces of wood per candlestick.  One will be used as the base and the other as the top to your candlestick (I used the smallest circular wood you can buy from Hobby Lobby).
- 3/16th Dowel Rod (I would suggest using a bigger dowel rod for more support…didn’t realize that until I was finished!)
- Glue
- Drill
- 3/16th and 7/32nd Drill bits
- Spray Paint
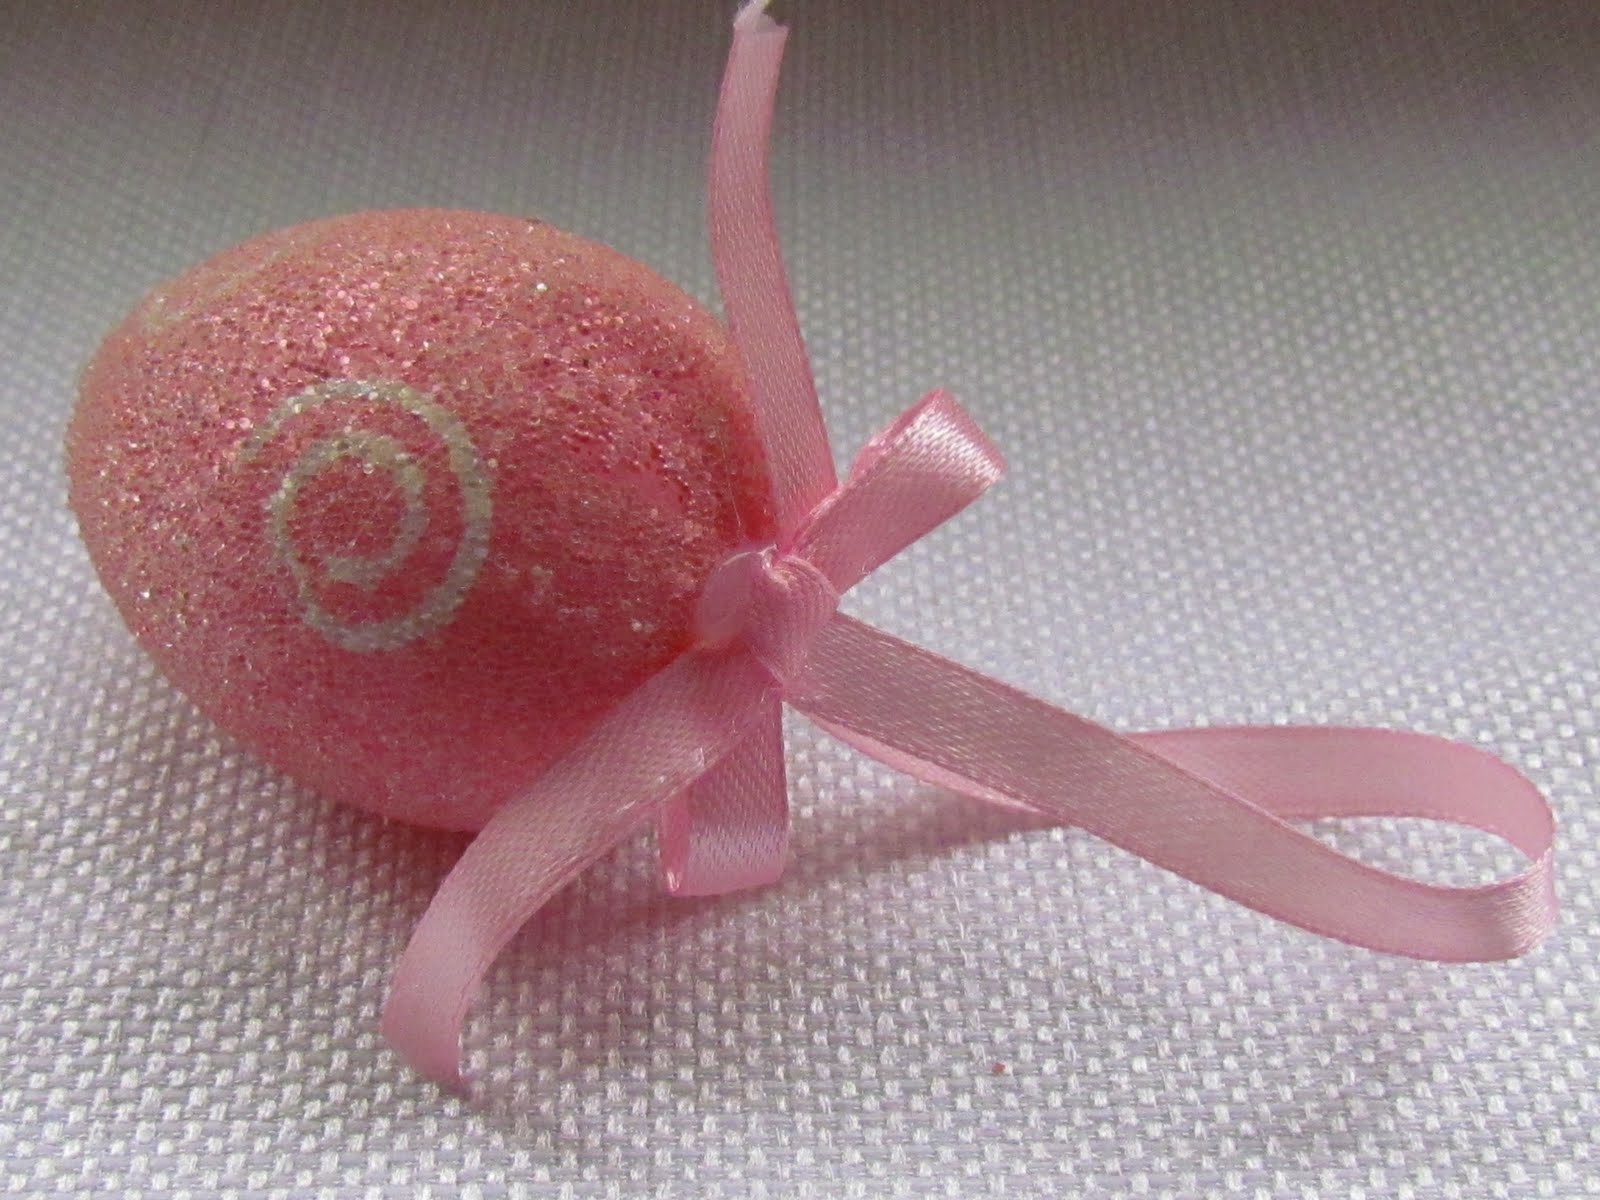
Step 1.  I purchased egg ornaments so my first step was to remove the bow and loop of ribbon.
Step 2.  Use a 7/32nd drill bit to drill a hole in the center of the top and bottom of the egg.  How many eggs you need to drill depends on how high you want your candlesticks to be.
Step 3.  Use a 3/16th drill bit and drill a 1/2 inch deep hole into the top of your wood piece/bases.  You will need two of these per candlestick.
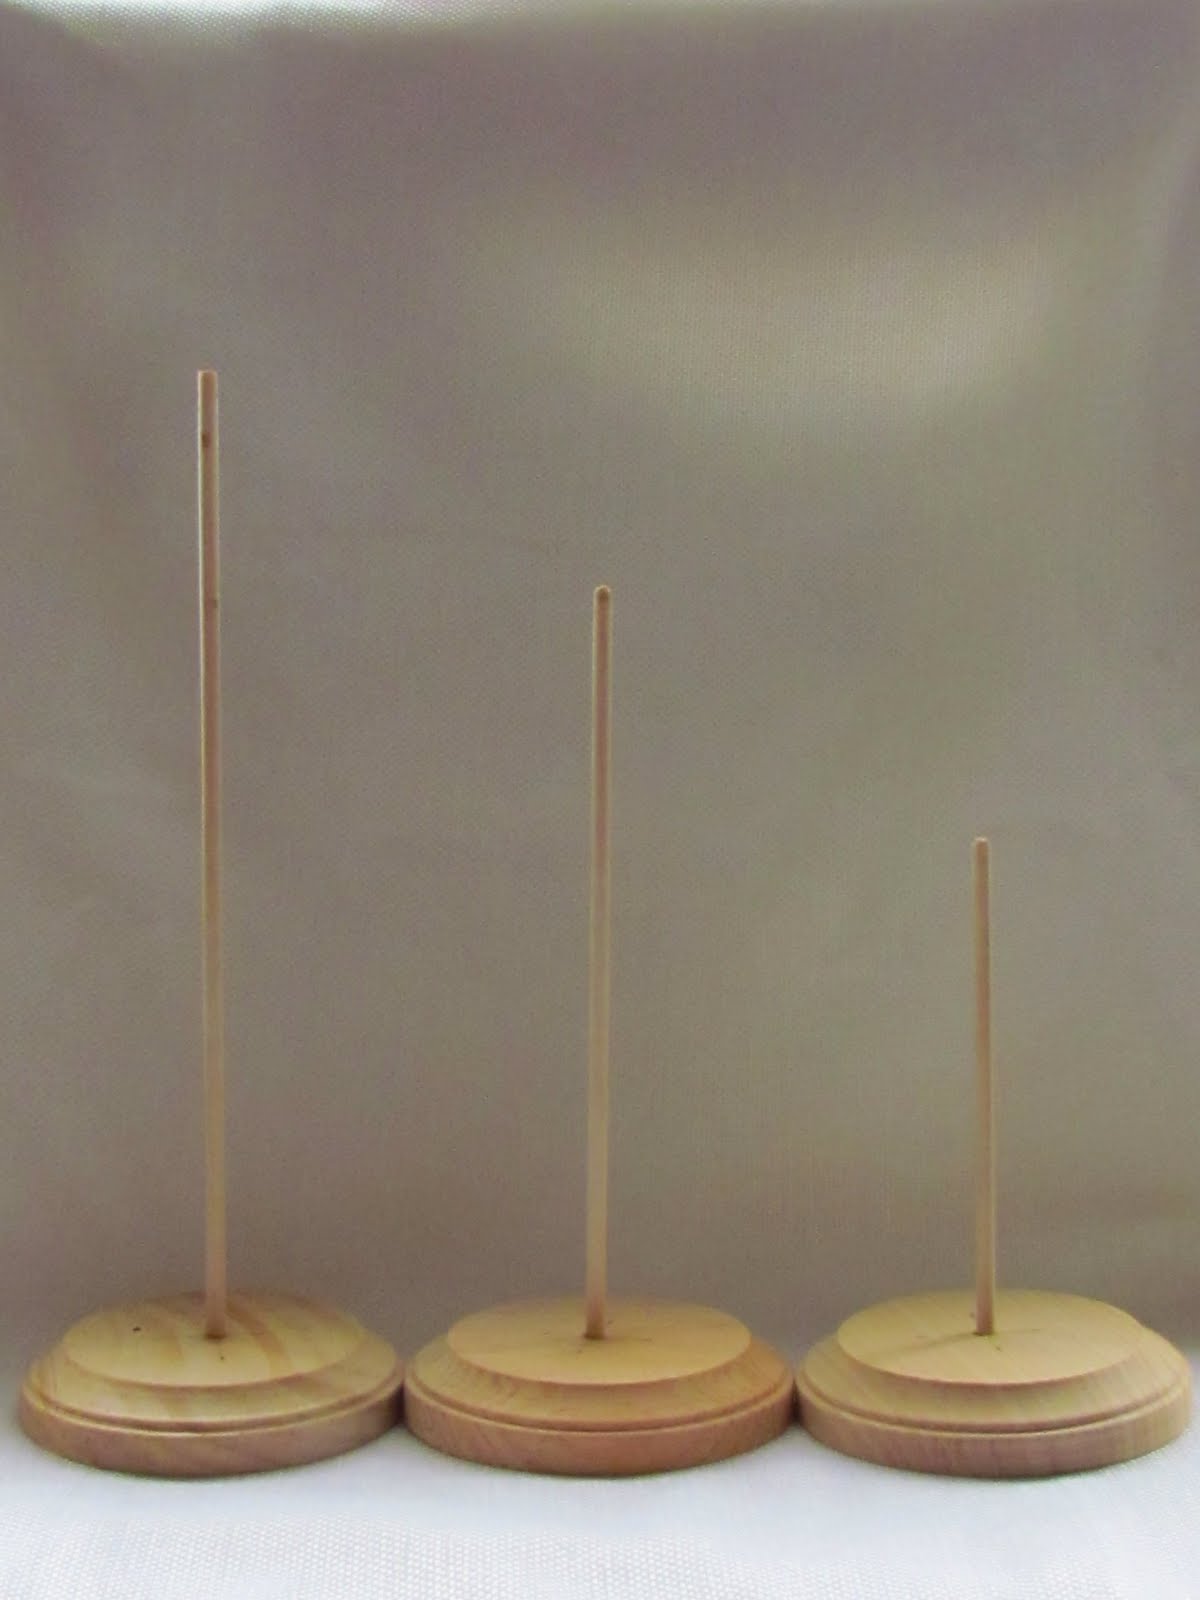
Step 4.  Insert dowel rod into the hole you drilled in the base.  Next slide eggs onto dowel rod to desired height.  Leave a 1/2 inch dowel rod sticking out of the top egg and cut off the rest.
Repeat steps 3 & 4 as many times as needed to make the bases for your candlesticks.  I choose to make 3 different heights as shown above.
Step 5.  Glue the cut off dowel rods into your bases.
Step 6.  Paint your bases and tops (not shown), let dry.
Step 7.  Slide your eggs onto the base.
Step 8.  Glue the top of your dowel rod into another circular piece of wood that you have drilled a hole into.
Bunch together on your Easter Tablescape with some pretty candles…
and stand back to admire your work!  If you love my Starburst Egg Mirror in the background or my Egg Place Card Holders on the table come visit JC’s Loft to see how I made them.
Thank you to the CSI Gals for having me over today!  I hope you enjoyed my tutorial.  Have a fabulous rest of your day…XOXO  Paula

Friday, March 8, 2013

How To Get Your Gross Plastic Containers Clean


Let's face it...we've all been there. Taco sauce, tomato soup/sauce, raviolis, they wreck havoc on our plastic containers! Here is an easy how-to-clean your containers out.


1. Fill almost to the top with water and a squirt of dish soap
2. Add 1/4 cup of bleach
3. Microwave the container for 40 seconds, or until the solution boils
4. Allow to rest until the water is luke-warm
5. Wash out your container and it is as good as new

PS: Any qualms about using bleach on plastic food containers? Then don't do this. Simple as that.

Dr Oz 3-Day Detox Cleanse

Yesterday I watched Dr Oz and thought this was a great plan to detox, so I'm going to try it. Reviews later! Dr Oz does suggest that before you start the Detox you eat a healthy meal (fish, chicken, greens, black rice or sweet potatoes) so your body doesn't start out "junked out" (junk food). 


Sunday, September 2, 2012

Homemade Fabric Softner


Prep Time: 5 mins.
Total Time: 5mins
Yield: 1 Gallon

"If you check the dangers of fabric softener you will appreciate this simple recipe that is much safer." 

Ingredients

6 - cups water
3 - cups white vinegar
2 - cups hair conditioner

Directions

1. Mix water, vinegar, and hair conditioner in a 1 gallon container; stir. Do not shake it; it will cause foaming.
2. Use the same amount you normally use in a rinse cycle or spritz it on a wash cloth and throw it in the dryer.

"You can put the fabric softener in a little Mason Jar and tie a cute little bow around the top and give away for a gift."